从易到难,来看4个功能按钮的实现,这一节讲【设置】相关的功能实现。
功能描述
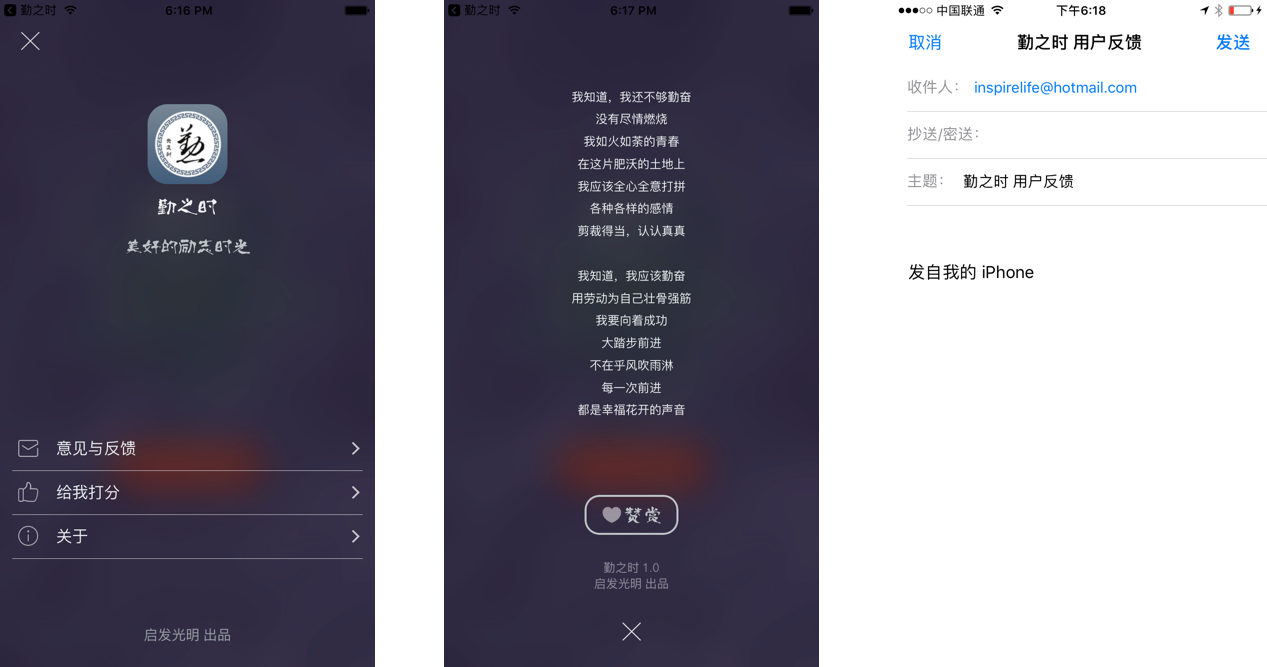
【设置】View Controller
- 点击【设置】按钮,以Present的形式显示Setting Controller。
- 左上角是关闭按钮,点击关闭Setting Controller
- Setting Controller基于Table View。 上面是【勤之时】的ICON以及一些描述,Table List有3项内容,如图。
- 底部是一行出品描述字
- 点击【意见和反馈】Cell跳转至邮件发送。
- 点击【给我打分】Cell跳转至Apple Store 【勤之时】的下载页面
- 点击【关于】按钮,Present【关于】页面
【关于】View Controller
- 中间为一首小诗
- 中下部有一个【赞赏】按钮,点击跳转至支付宝客户端,进行转账。
- 【赞赏】按钮下是一串描述文字。
- 底部是【关闭】按钮,点击返回【设置】页面。
MVC设计考虑:
- Controller:
- ILDSettingViewController:主要包含一个TableView,背景设置为虚化的主页面。
- ILDAboutViewController:About的功能实现,同样,背景为虚化的主页面。
- 考虑到背景都为虚化的主页面,以及我们后续都需要这个以虚化的主页面为背景的Controller,这边设计一个ILDBaseViewController,作为基类,主要用户虚化的主页面的背景设置。
- Model:
- 无
- View:
- ILDSettingViewController 需要 ILDLogoView,来作为Table View的headerView
- ILDSettingDefaultCell 为 Table View 的自定义Cell。
ILDSettingViewController的编码:
- settingListTableView的初始化,主要是添加ILDLogoView作为它的HeaderView
1 | - (UITableView *)settingListTableView { |
- 以及settingListTableView的datasource和delegate
1 | - (UITableViewCell *)tableView:(UITableView *)tableView cellForRowAtIndexPath:(NSIndexPath *)indexPath { |
ILDAboutViewController的编码:
- 主要还是布局的问题。除了布局,就是点赞的按钮会跳转到支付宝,向我发起支付
1 | if ([[UIDevice currentDevice].systemVersion floatValue] >= 10.0) { |
这个功能是怎么实现的?这里不需要注册额外的什么支付宝开发等等,主要的就是怎么找到这个Schema1
NSString *const kPayURL = @"alipayqr://platformapi/startapp?saId=10000007&qrcode=HTTPS://QR.ALIPAY.COM/xxxxxxxxxxxxxxxx";
最后一串就是你的支付宝ID对应的二维编码解析得到的结果。你可以打开支付宝,找到自己的二维码,然后Decoder这个二维码,你就会发现HTTPS://QR.ALIPAY.COM/xxxxxxxxxxxxxxxx这一串代码,然后代替上面的就可以了。